Wednesday, November 10, 2010

General Bread Baking Guidelines

So you want to make bread? If you follow some easy guidelines you can make up your own recipes and experiment with the results. Have fun!

Formula:
Flour 100%
Water 60% - 70% - 80% of flour weight   (tight crumb - holey crumb – very holey crumb)
Yeast 1% of flour weight
Salt 2% of flour weight

Example:
900 g flour                           6.5-7 c flour
540-630 g water                2⅓ - 2¾ - 3¼ c water (tight even crumb – loose holey crumb)
9 g yeast                              1 T yeast
18 g salt                                1 T salt

A nice flour mix is 70% white, 20% wheat, and 10% rye by weight or volume.

Using milk instead of water makes a softer, more tender crumb.

Add oil or butter to make it richer and more tender and makes the bread keep longer.  Don’t include fats in the liquid percentage.  

Sugar is added for sweetness. Don’t include sugars in your percentages. 

Malt syrup is a flavorful sweetener. You don’t need much, maybe a tablespoon per pound of flour, to make a difference.

Mix dough until it comes together and is all wet. Cover the dough let it rest for 20-30 minutes. Knead dough for a few minutes until its smooth.   Try not to add extra flour. Place in an oiled bowl and cover. 

Note: The rest time is called autolyse. The gluten will develop on it's own if given the time. Kneading will then be fast and productive.

Allow dough to double and then make into loaves.  Allow to double again and bake.

Before you put it in the oven, you can paint on some whole egg or egg white. Whole egg will make the crust browner and the white will just make it shiny.

Whole grain flour should be soaked in some of the recipe water for a while to become fully hydrated. Overnight is easy because it’s ready for you in the morning. If soaking whole grains, drain them very well afterward and don’t count the liquid in your recipe. Soaked whole grains don’t count as flour either.  Nuts don’t need to be soaked. You might want to toast them lightly in a dry skillet to make them tastier but you don’t need to.

Retarding the dough will give it better flavor. At any point in the recipe you can just cover and stick it in the fridge. The next day, warm for a couple of hours and continue. If you don’t have time that day, leave it in the fridge another day.

Extra rises will also add flavor. Avoid artificially heating the dough to get it to rise faster. A slow cool rise will make better flavor.

Rolls bake at 400 or 425 for 15-20 minutes. Loaves bake at 350-400 for 40-60 minutes depending on size and density. Loaf center should be 200 degrees when done.  A heavy whole grain loaf will take longer than a light airy white loaf.  Wetter dough cooks longer because it has more water to cook off. Checking the temperature is a foolproof way to check for doneness.

Bread should ideally cool about an hour to complete cooking inside but sometimes you just can’t wait! Big deal, go for it!

If you want big holes in your crumb, you need to increase the liquid percentage.  Some people increase it to as much as 100% but you don’t have to go that high. Going to 70% makes a big difference.  Wet dough is harder to work with. It requires some new skills that I will go into at a later date.

Thursday, October 14, 2010

Mediterranean Rolls

 
These rolls are easy. You can stir them up after lunch and have them for dinner. I used real Parmigiano Reggiano Cheese. You can use any Parmesan or dry cheese you want, like Asiago.
Make sure you like the cheese you use because that's how they will taste. Makes 9 large rolls.

Mediterranean Rolls
400-450 g flour (3-3½ cups)
300 g water (1 1/3 cups)
100 g Parmigiano Reggiano Cheese (one cup or 3½ oz)
7 g instant yeast (2 t)
2 tsp honey
1 tsp salt
25g olive oil (2 T) for the top

Dissolve yeast and honey in a little of the water and let rise for 10-15 minutes.
In a large bowl stir together the flour, salt, and finely grated cheese. Make a well and pour in the yeast and remaining water, Knead until you have a soft, uniform dough.
Shape into a ball and place in a greased bowl, cover it with cloth and leave in a warm place to rise until doubled in volume.
Pour the risen dough onto a work surface, and cut it to 9 equal parts. Shape rolls, place them in greased 9x9 pan. Allow rolls to rise until doubled. Brush them with olive oil. If you like, you may sprinkle them with dried herbs.
Bake 20-30 minutes at 350. Brush with olive oil again. 
Enjoy!


Tuesday, September 28, 2010

Ciabatta!


This bread is very unusual to make. The dough is extremely wet, but that's what it takes to get the big holes of ciabatta. Seriously, it's thinner than pancake batter! The crust is thin and flexible, but not soft. It makes an absolutely fantastic sandwich. We used it for italian sausage, onion, and pepper sandwiches. Wow! The inside is soft and holey. BTW, coccodrillo means crocodile.


Adapted from "Jason's Quick Coccodrillo Ciabatta" on thefreshloaf.com
Timing: 4-5 hours total

500g bread flour
475g water
2 tsp. yeast
15g salt

In Kitchen Aid mixer: Mix all ingredients roughly till combined. Let it rest for 10 minutes. Now beat the crap out of the batter with the flat beater; it will start out like pancake batter but in anywhere from 10 to 30 minutes it will set up and work like a very sticky dough. If it starts climbing too soon, then switch to the hook. You'll know it's done when it separates from the side of the bowl and starts to climb up your hook/paddle and just comes off the bottom of the bowl.

Ferment: Place into a well-oiled container for about 2.5 hours and let it triple. Empty on to a floured counter (scrape if you must), and cut into 3 or 4 pieces. 

Bake: Place the pieces on parchment paper. Spray with oil and dust with flour. Let them proof for about 45 minutes, while preheating the oven up to 500F. After 45 minutes or so the loaves should be puffy and wobbly.  Stretch the dough into ciabatta shape (~10" oblong rectangle). Bake on a preheated stone at 500F for about 15-20 minutes. I made a half batch and baked the two loaves separately.


Thursday, September 16, 2010

No Knead 100% Whole Wheat Bread


This is the easiest bread in the world. On Sunday night I mixed it all together in a 6 quart container and left it on the counter for 3 hours so it could double. Then I stuck it in the fridge. I took a handful out on Monday night and made a pizza with it. That's another post. On Tuesday morning, I took the container out of the fridge and put it on the counter for about 3 hours to warm up and start rising. Then  I grabbed about 1 1/2 lbs of the dough out of the container and formed it into a loaf. I put it in a loaf pan and let it double and baked it. The bread is moist and soft. It holds together well for a sandwich. The dough is very sticky so use wet hands when handling it. Give it a try! I still have another loaf's worth in the fridge for tomorrow. You can make fresh bread for up to a week and the longer it ferments in the fridge, the better it tastes.
Update: I baked the second loaf today. The dough smelled a little sour but the bread was great. Before rolling it into a loaf, I sprinkled the rectangle with a good amount of cinnamon sugar. WOW!


100 Percent Whole-Wheat Sandwich Bread
adapted from "Artisan Bread in 5 Minutes a Day"

1 T yeast (1 pkt)
1 T salt
1/2 cup honey
5 T oil, plus more for greasing the pan
3 cups lukewarm milk
6 2⁄3 cups whole wheat flour (not packed) (I like Gold Medal and King Arthur brands)
2 T vital wheat gluten (optional but makes a lighter loaf)

Mix the yeast, salt, honey, oil, and milk in a 6-quart bowl or other container. Stir it enough to dissolve the yeast.

Mix in the flour and gluten using a large spoon and a little muscle. Make sure all the flour is wet. The dough will be very wet.

Cover loosely, and allow to rest at room temperature until the dough doubles or triples (about 2 to 3 hours).

Refrigerate and use over the next several days.

On baking day, remove the container from the refrigerator to warm it up for a couple of hours. Lightly grease a loaf pan. Using wet hands, scoop out a 1 1⁄2 pound (cantaloupe-sized) hunk of dough. Keeping your hands wet, form a loaf. There are fancy ways to do this but you can just flatten the dough into a rectangle (the length of your pan) on the counter and roll it up. Spray the counter first with oil so it doesn't stick.

Drop the loaf into the prepared pan. You’ll want enough dough to fill the pan slightly more than half-full. Spray with oil and cover.

Allow the dough to rise until doubled. This will take an hour or so, depending on the temperature of your kitchen.  Bake at 350 degrees for 50 to 60 minutes or until internal temperature is over 200. It should be nicely browned and firm.

Cool completely before slicing.

Note: If you are weighing your flour, which is a great idea by the way, whole wheat flour is about 4.75 oz/cup or 130 g/cup. If you don't weigh your flour, at least don't pack it in the cup. Loosen the flour first and then scoop it.

Roman Bakery Video

This is just about the coolest video I've ever watched. It's a sped up version of a day in a bakery in Rome. Take a look!

Roman Bakery Video

Saturday, September 11, 2010

Baked Apple Pancake


 Many years ago, in Chicago, we had a baked apple pancake at a breakfast restaurant out by O'Hare Airport. It was so delicious and I haven't had one since. Today I found this recipe on thekitchn.com and it was beautiful! And did I mention it was delicious? It was. Give it a try for a special breakfast. It easily feeds 4 people or one pig! It has lots of caramely (not a word, I know) goodness and a custard pancake with great texture. It tasted just like the one in Chicago, as far as I remember. Here's the link again ---  

Thursday, September 9, 2010

100% Whole Wheat Bread


This is 100% whole wheat sandwich bread adapted from the book "Whole Grain Breads". It's a moist loaf and very light for a 100% loaf.

The recipe calls for both a biga and a soaker. A biga is a flour and water mixture with a very small amount of yeast. The biga is made a day ahead so it can ferment and give a lot of flavor to the loaf. A soaker is mixture of flour, liquid, and salt that is made a day ahead so it can become fully hydrated. These both can be mixed by hand in a small amount of time.

One problem with whole wheat bread is dryness due to the grain not being fully hydrated when mixed. This recipe takes care of that problem.


100% Whole Wheat Bread
(makes one loaf)


Biga
1 3/4 c whole wheat flour (227 g)
1/4 t instant yeast (1 g)
3/4 c tepid water (170 g)

Mix together very well, making sure all flour is incorporated. Place in a covered container and refrigerate.

Soaker
1 3/4 c whole wheat flour (227g)
1/2 t salt (4 g)
3/4 c plus 2 T buttermilk (198g)
Mix together very well, making sure all flour is incorporated. Place in a covered container and refrigerate.
Dough
biga
soaker
7 T whole wheat flour (56g)
1/2 t salt (5g)
2 1/4 t instant yeast (7g) (same as bread machine yeast)
2 T honey (43 g)
1 T butter (14g)

On baking day, remove the biga and soaker from the refrigerator a couple of hours before you start, to take the chill off. Cut the biga and soaker into pieces and add everything else. Mix and knead until ingredients are evenly distributed. Knead for 4 or 5 minutes, adding no more extra flour than necessary. The dough should be very tacky, almost sticky. Make adjustments with extra flour or water until you achieve this consistency. Place in an oiled bowl and allow to rise for about 45 to 50 minutes until it increases by about half. Form into a loaf and place in a large oiled loaf pan (about 9x5"). Sprinkle with bran, wheatgerm, or sesame seeds if desired. Let rise for 45 to 50 minutes until it increases by about half.
Meanwhile, preheat oven to 425. After putting the loaf in the oven, lower the temperature to 350 and bake for 40 to 50 minutes. Cool for one hour before slicing.


Friday, September 3, 2010

Hamelman's Corn Bread


What a day! I am amazed this loaf made it to the table. Everything that I could do wrong, I did wrong and it still tasted good. Hamelman's corn bread (recipe  here) is a yeast bread with some corn meal (flour) in it and mostly bread flour. It's a moist, heavy, but at the same time soft bread. Delicious. I started making the bread at 10 am today. I mixed the preferment, thinking I could bake tomorrow. I decided to make half a batch then I went to Applebee's with my friend, Cathy. On the way home I was daydreaming and started to turn in front of a car. Whew! That was close! When I got home, the preferment (which was supposed to sit overnight) hadn't really done anything yet and I started the bread anyway (I don't know why I didn't wait until tomorrow). Forgetting that I was only making half a batch I warmed the wrong amount of water and tossed it in the bowl, without measuring or weighing it. What was I thinking? Then I added the corn flour, weighing it first (amazingly). Then I realized that the preferment was for a half batch. Okay, I thought, I can figure this out and save it. I did everything I could to make it into a full batch. But it won't have the flavor, I thought, so I tossed in a couple of spoonfuls of my sourdough starter, thinking that might give it a little flavor. Then I realized that I wasn't supposed to make the bread until tomorrow (crap!). I finally got the dough mixed up according to directions and it seemed okay. But then I decided we may as well have it for dinner and if I followed instructions, the rise time and folding would take too long. Soooo... I kneaded it longer until it almost passed a windowpane test and let it rise for 1 hour. It doubled so I made up loaves and let it rise about 40 minutes. The instructions called for baking at 460 degrees. I thought I would give them a boost and start at 500 and immediately turn it down to 450 when I put the loaves in. When the loaves were finally in the oven, I used my teakettle to put boiling water in the steam pan, or tried to. After fully steaming my right hand (ouch!) and spilling most of the water on the oven door and floor and stone, I gave up. The loaves were doing well after about 10 minutes so I set a timer and sat down in the living room where I couldn't hurt anything else or myself. A few minutes later, I smelled something burning. AAK! I forgot to turn the oven down. The loaves were very brown and only a little burnt but not done on the inside so I put foil over them (so they wouldn't brown anymore) and turned the oven down to 400 and let them go another 10 minutes. The back of one the loaves is very burned but I didn't take a picture of that.
Despite all of that, the bread was actually very good. I wonder how different it would taste if I made it correctly.
I hope you don't think I'm like this all the time. Today I just had one of those "should have stayed in bed" days. Anyway, next time you're having a bad day, read this again! It'll make you feel better.


Thursday, August 19, 2010

Rustic Italian Bread

I just pulled these babies out of the oven! Man, they smell great. Maybe I should have painted them with egg white before they went in to give them some gloss.


The recipe is from Cookography, a food website like this one. It's a little involved. We'll see if it's worth the trouble. The bread is started the day before, mixing a little yeast with some flour and water and letting it raise for 3 hours. On baking day, the rest of the dough is made and combined with the fermented dough. This rises basically 3 times and is then made into loaves and baked. See the recipe for details. I'll add a crumb shot later and let you know how it was. These were very light and feathery and had good flavor. The crust was crisp and chewy.

Tuesday, August 10, 2010

Cinnamon Crispies


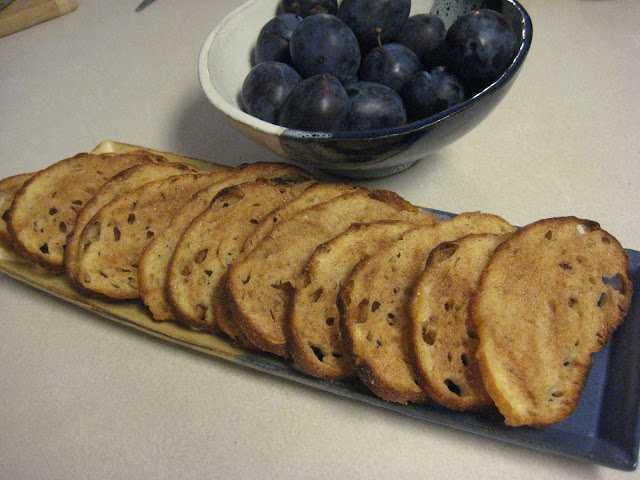
      What to do with leftover homemade bread? It's so good the first day, and not too bad the second day, but now it's the third day and it's losing its appeal. 
1. Slice the bread into about 1/8 inch slices with a good bread knife.


2. Place on parchment paper on a cookie sheet and bake at 300F for about 15 minutes.

3. Flip over and bake 5 more minutes.

4. Spray with spray oil and sprinkle with cinnamon sugar. Bake for 5 more minutes.


5. Eat immediately before anyone else notices you made them. Enjoy!

Tuesday, August 3, 2010

123 Sourdough


Over the weekend I made a 123 sourdough recipe that I found on thefreshloaf.com.  It was originally from Flo Makanai. You can learn to make this if you have sourdough starter around the house and you can learn a couple of techniques. You must use a 100% hydration starter which just means it is half flour and half water (by weight). All ingredients are weighed precisely. I strongly urge anyone who is wanting to really get into bread making to read all you can from thefreshloaf.com and start trying things. Even the loaves that don't turn out will taste good.

Very Active 100% Starter
123 Sourdough

Use 100% hydration starter! (half water, half flour by weight)

The formula:

For every 1 gram of starter, use 2 grams water and 3 grams flour. Use 1.8-2.0% salt to flour ratio
450 F oven for about 30 min.
Example: with 125g sourdough, I'll bake bread with 250g liquid and 375g flour + 6 to 7g salt

My version:

123 Sourdough


250 g starter
500  g water
750 g flour (half all purpose and half bread flour)
14 g salt


Put everything in the KA mixer and combine. Let sit for 30 minutes to give time for the flour to absorb the water. With a dough hook, knead the dough until it passes the window pane test. Mine took 10 minutes.
Window pane test: Pull out a small piece of dough and stretch it into a thin rectangle in the air. It should hold together and form a film you can almost see through. Here's a video.
Plop the dough onto the counter and do a stretch and fold. Place in a lightly oiled bowl. Repeat the stretch and fold every 30 or 40 minutes for 3 or 4 more folds, returning to the bowl each time.
Stretch and fold: Here's a video.
It is a very wet dough and hard to work with but keep going. Eventually you will be able to make it into 2 loaves about 15 inches long. Let rise until puffy and risen. Slash with a serrated knife. Bake on a stone in a 450 oven for about a half hour. Spray with water a few times in the first 10 minutes.

Wet dough rising!

 The bread came out very crusty and tasty. We ate it dipped in olive oil with garlic and salt.


In the oven


Thursday, July 22, 2010

The Giant Cookie


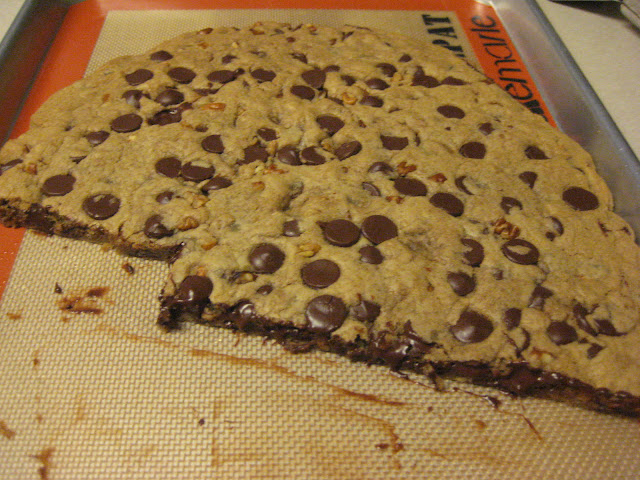
This summer my kids are home from college and we seem to have a lot of extra kids around. I don't know how often I have made this cookie in the past 2 months and it always goes over well. It's just so good! I originally found this recipe on www.melskitchencafe.com. I changed only the amount of chips.


Giant Cookie


1/2 cup white sugar
1/2 cup dark brown sugar
1/2 cup butter, melted and cooled
1 egg
1/2 teaspoon soda
1/2 teaspoon salt
1/2 teaspoon vanilla
1 1/2 cup flour
1 (11.5 oz) pkg ghiradelli chocolate chips (milk chocolate goes over best)
nuts, optional

Preheat oven to 350 degrees.
In a medium bowl, cream together the sugars and butter. Add the egg and vanilla and mix. Add the dry ingredients and mix well. Fold in the chocolate chips.
Line a large (11X17-inch) baking pan with foil or parchment or silpat and press the cookie into a circle. I press my cookie into a 9-inch circle, about 3/4 inch thick.
Bake for 15-16 minutes until the cookie is lightly golden brown. Let the cookie cool completely on the baking pan.
Recipe note: This many chips is really going overboard, but it's delicious. One cup would be plenty. Also, I use C&H dark brown sugar (the one in the box). It's very dark and makes a really great cookie. If you use a lighter brown sugar, use one cup of brown sugar and no white sugar.


I used pecans and 60% cocoa chips in this batch.

New Mixer and Semolina Bread

The new KA mixer is fantastic and beautiful!


 I made Semolina Bread yesterday. I wasn't real happy with the results so I won't post the recipe. When I was making it, I thought the salt and yeast amounts were high but I made it anyway.  When I tasted the dough, it was so salty and yeasty and it rose immediately. I decided to add white flour and water and knead again. (I was out of semolina at that point) The bread turned out fine but I wanted an all semolina loaf and it just tasted mostly like white bread. Bad recipe, I guess. From now on I'll trust my instincts. I will make again with a new recipe and post that later. These are the pics of the loaves I made. The last pic is sideways but I can't figure out why or how to turn it.